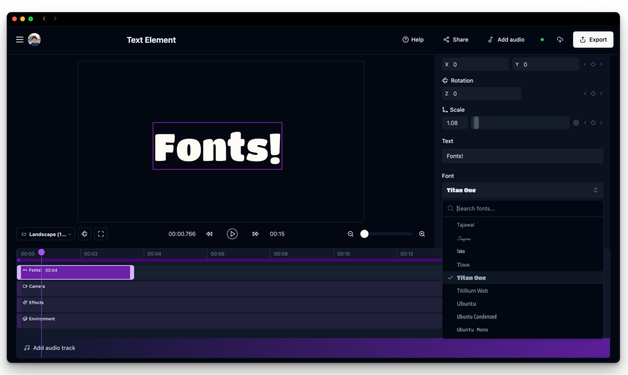
New Export System, Shaders and Bugfixes

Here's a quick overview of the today's update:

  • New export system: Choose output quality, cancel exports, export the same project multiple times.
  • Improvements and bugfixes: Editor workflow enhancements and critical bug fixes reported by the community.
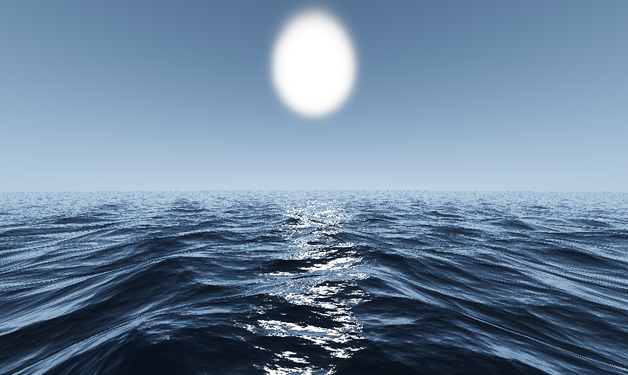
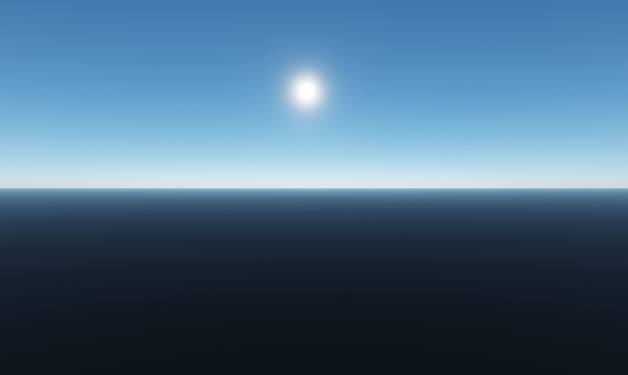
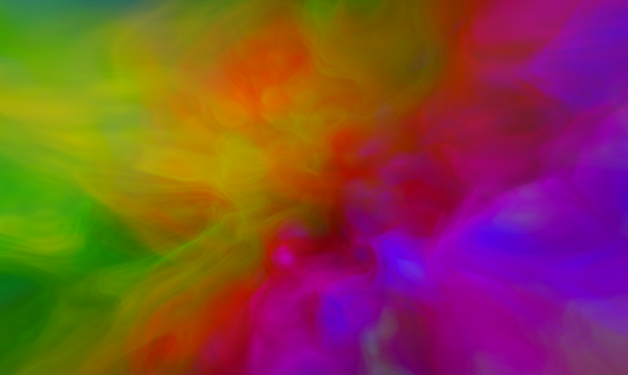
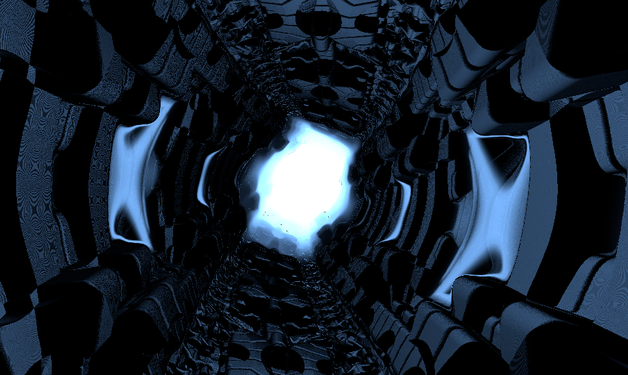
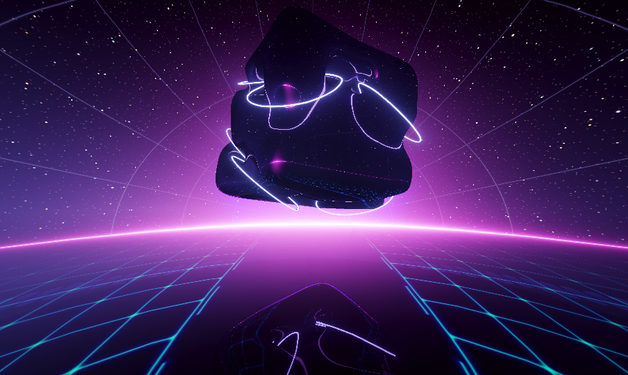
  • 2 new shaders added: Quick and Hexler.
  • Desktop App Coming Soon: We're working on a desktop app that will enable you to render your projects locally and create videos up to 1 hour long.

New Export System

Multiple Simultaneous Exports

You can now export the same project multiple times with different settings, eliminating the need to wait for exports to finish or duplicate projects. This is perfect for creating different versions of your work for various platforms.

A list of previous and active exports for a project.

Better Export Management

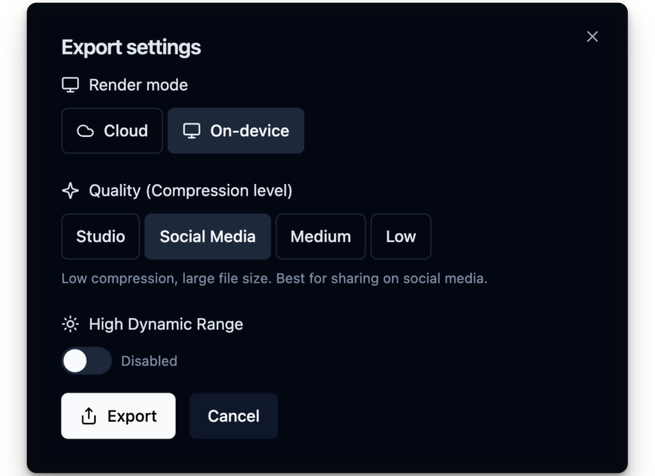
  • Choose output quality: Choose from four quality presets to balance file size and visual fidelity.
  • Cancel exports: New cancel button lets you stop unnecessary exports instantly.
  • Export history: Track all your export versions in one place (note: exports expire in 3 days).
4 options for output quality: Studio, Social Media, Medium and Low.

💡 How do I duplicate a project after these changes?

Right click on the project on the Projects page and select "Duplicate".

New Shaders

New shaders have been added to the library. You can find them by adding a new shader clip to the timeline and selecting the shader from the gallery.

Quick
Hexler

Enhanced Workflow & Fixes

New Features

  • 3D Video opacity control: Create stunning layered effects with transparent 3D videos
  • Smart object placement: New objects now appear at your camera's focal point
  • Magnetic timeline edge: Clips automatically snap to scene endpoints
  • Cleaner interface: Keyframes hide during clip renaming for better focus

Important Fixes

  • Improved Sketchfab integration with proper error handling
  • Fixed 3D model and video preview updating
  • Resolved timeline interaction issues:
    • Fixed conflict between clip resize and keyframe handles
    • Prevented clips from being dragged outside timeline bounds
  • Added proper error alerts for autosave failures

Coming Soon: Desktop App

We're working on a desktop app that will enable you to render your projects locally:

  • Local Rendering: No need for video downloads. Render your projects on your machine.
  • Extended Duration: Create videos up to 1 hour long. The most requested feature is coming soon!

Future updates will focus on creating a unified experience between web and desktop platforms.

Stay tuned for more updates!

Igor Samokhovets photoIgor Samokhovets

October 30, 2024

Copy link

Text Align, New Templates and Shaders

New features added to the editor:

  • Text alignment. You can now align text to the left, center, or right. This fixes the issue where text was always centered and some templates looked off.
  • Optional text fields in templates. You can now leave fields empty if you don't want to add text to your scene.
  • Fixed a bug where the editor would crash when opening a template dialog.

New Templates

3 new templates are added to the editor. Templates are pre-made scenes that you can use as a starting point for your projects.

You can find new templates in the Templates section.

Boombox
Trippy Metro
Spaceship

New Shaders

4 new shaders are added to the editor.

Palette
Distorsi
Shift
Psycho
Igor Samokhovets photoIgor Samokhovets

September 27, 2024

Copy link

New Shaders, Templates and Editor Improvements

5 new shaders are added to the editor. Shaders are small programs that run on your GPU and are used to create highly customizable visual effects.

You can use them by adding an element called Shader to your scene and selecting one of the available shaders.

Mind
Waves
Plexus
Hypno
Acid

New Templates

3 new templates are added to the editor. Templates are pre-made scenes that you can use as a starting point for your projects.

You can find new templates in the Templates section.

Turntable in the Gallery
Warehouse
Fractals

Editor Improvements

  • Clip can now resize parent scene. When you resize a clip and overexceed the parent scene duration, the parent scene will be automatically resized.
  • Auto-extension of the clip. If clips start or end time is equal to the parent scene duration, the clip will be automatically extended to match the parent scene duration.
Igor Samokhovets photoIgor Samokhovets

September 18, 2024

Copy link

New Audio Workflow and Adaptive Video Duration

Today's update brings several improvements to the audio workflow in the editor, addresses bugs reported by the community, and introduces other enhancements to streamline your video creation process.

Drag the audio track to select the region

We have simplified the process for selecting audio regions directly within the timeline, eliminating the need for a separate audio region selection screen.

Previously, selecting an audio region required navigating to a separate screen. While this approach worked initially, it often created challenges when synchronizing audio with video content, especially after adding multiple scenes or clips. Users found it difficult to determine which part of the video the selected audio was aligned with.

Now, you can select the desired audio region by dragging the audio track left or right directly in the timeline. This change makes it easier to sync audio with specific parts of your video, providing a more intuitive editing experience.

Additionally, the new workflow allows you to create and export projects without audio, resulting in silent videos if desired.

Adaptive video duration

Previously, the duration of your video was determined by the length of the audio region you selected.

For example, if you chose a 20-second audio segment, the final video would be exactly 20 seconds long, regardless of the number or length of the scenes in your project.

Because we removed the audio region selection screen, we needed a new way to define the video duration.

With the new update, the duration of your video is now automatically defined by the total length of all the scenes on the timeline. A scene is essentially a "container" that holds clips, effects, and camera settings. As you add or adjust scenes, the video's length will change accordingly.

The scene is a "container" for the clips, effects and camera settings. The total duration of all scenes defines the video duration.

To modify the duration of a scene, simply drag the scene's edge (left or right) to the desired position, as demonstrated in the video above. The overall video length will update in real-time based on these adjustments, giving you more control over the final output.

This change allows for more flexibility in video creation, as the video length will now adapt dynamically to your content, rather than being constrained by a pre-selected audio track.

Other improvements

  • Set minimal video duration to 5 seconds
  • Fix editor crashes when editing VHS effect settings
Igor Samokhovets photoIgor Samokhovets

September 4, 2024

Copy link

Split Clips and Enhanced Editor Controls

Today's update brings better controls for 3D objects, improved value inputs, and bug fixes reported by the community.

Split Clips

Right-click on a clip and select "Split clip" to split it into two clips. You can also use the keyboard shortcut Cmd + K on Mac or Ctrl + K on Windows.

Split Clip in clip's context menu

Better 3D controls in video preview

3D controls are now more intuitive and easier to use:

  • Rotate objects around a specific axis
  • Tooltips with units for position and rotation
  • Controls size is now consistent and doesn't change with object size

Improved value inputs

All inputs were redesigned to make them more consistent and user-friendly.

  • Value inputs are now more compact
  • Use arrow keys to change values
  • Click and drag to change values
  • Redesigned value sliders

Animation start time for 3D models

You can now specify the start time in frames for animations on 3D models. This allows you to sync animations with other elements in your video. When animation is selected, you'll see a new input field for the start time.

Bug fixes

  • Fixed a bug when dragging multiple files for upload resulted in only one file being uploaded (thanks Vivid Fever Dreams for reporting)
  • Fixed an issue when input fields were not accepting comma as a decimal separator
  • Fixed an issue when Sketchfab connection dialog was not opening for some users
Igor Samokhovets photoIgor Samokhovets

August 19, 2024

Copy link

Release 4.0: Timeline Clips, 3D Videos, and Asset Library

We are excited to announce the biggest update to Banger.Show since its launch. This update brings a lot of new features and improvements that unlock new creative possibilities and make working with your videos easier than ever.

New features include:

  • Timeline Clips: Place elements on the timeline and control their duration.
  • 3D Videos: Add your videos to the 3D space and control their playback.
  • Asset Library: Upload your local files, use 3D models from Sketchfab, and stock videos from Pexels. Use drag-and-drop to place assets on the timeline.

Timeline Clips

From now on, you can place elements on the timeline and control their duration.

This unlocks new creative possibilities and makes the interface familiar to users who are used to video editing tools. You can drag and drop elements onto the timeline, adjust their duration, and control when they appear and disappear.

Multiple 3D models, videos and lights placed on the timeline.

Why did we make this change?

Earlier, Banger.Show used a Scenes-only concept in the editor.

Each scene was a group of elements that appeared simultaneously and stayed on the screen until the scene ended.

This method aimed to offer a simple and easy-to-use editing experience, which helped keep the interface clean. However, it limited creative options and made organization more cumbersome.

For instance, if you wanted an element to disappear at a specific point, you had to create a new scene without that element. This process was not intuitive and often resulted in having many scenes just to control the timing of elements.

A screenshot of the previous version of Banger.Show.

Using clips is the industry-standard approach to working with video elements. We initially experimented with Scenes to make the interface more accessible but realized that adopting the standard approach would be more beneficial in the long run.

Scenes are still there and serve as "containers" for clips, effects and camera settings.

Add your videos to the 3D space

Introducing a new element type: Video.

It functions just like a regular video clip from any video editor. You can crop it, adjust its duration, position, and rotation. It allows you to seamlessly combine video assets with 3D models, effects, lights, and other elements to create stunning visuals.

On the timeline, the video clip shows a preview of the video frame.

Control how far your videos appear

Unlike other video editors, Banger.Show allows you to manipulate not just the X and Y positions, but also the Z axis. This means you can place objects at different depths:

  • Objects with a higher Z-value appear further away.
  • Objects with a lower Z-value appear closer.

Adding videos

To add a video, simply drag your video file onto the timeline or into the Asset Library.

Asset Library

The new Asset Library serves as a comprehensive hub for all your assets and available elements.

It is organized into two main sections:

  • Import: Upload local files or import assets from external sources like Sketchfab and Pexels.
  • Elements: Access sound visualizers, lights, shader backgrounds, and more.
Videos, 3D models, and images in the Asset Library.

In the past, adding an asset to your project involved a multi-step process: adding an element to the scene, uploading the file, and then adjusting its properties.

Now, you can streamline this process by simply dragging and dropping files directly from your computer to either the timeline or the Asset Library, making them immediately available for use.

Drag-and-drop elements onto the timeline

To add an element to the scene, just drag the desired asset from the Asset Library and drop it onto the timeline.

Other improvements

  • Better render progress indication: Added a estimated time remaining indicator to the render progress bar.
  • Sparkles Element: Add a sparkles object to your scene to create a magical effect.

We're looking forward to your feedback

This new update is a significant step forward in making Banger.Show more powerful. We hope you enjoy these new features and look forward to seeing the amazing content you create with them.

Please let us know about any issues you encounter or features you'd like to see in the future. Your feedback is invaluable to us.

Igor Samokhovets photoIgor Samokhovets

August 2, 2024

Copy link

Fly Mode and Camera Keyframes

Camera controls in the editor are improved.

  • Fly around the scene with the new Fly Mode
  • Create camera keyframes to animate camera movements

This is useful for creating cinematic shots or adding a bit of dynamism to your video.

I recorded a short 2 minute video to show you how to use these new features.

Igor Samokhovets photoIgor Samokhovets

June 5, 2024

Copy link

Keyframes for Automating Parameters

This update brings the ability to automate parameters over time using keyframes. You can now animate any parameter in the app to create truly unique visuals.

In the video example, keyframes are used for the Position, Rotation, and Scale parameters to animate the skull model. The background shader color is also animated. The camera movement is also automated using keyframes.

Animating Parameters

To create a keyframe animation, follow these steps:

  1. Click the keyframe button â—† next to the parameter you want to animate.
  2. Move the play head to the desired time.
  3. Change the parameter value.

This will create a keyframe â—† at the current time with the parameter value you set. The parameter will now animate between the keyframes. You can add more keyframes to create complex animations and combine them with other parameters.

Keyframes Timeline

The keyframes are also displayed in the timeline so you can easily see the animation. Drag the keyframes to change their time, or right-click to duplicate or delete them.

Keyframes are shown only for the currently selected object in the scene (objects, backgrounds, effects, camera).

This feature opens up a whole new world of possibilities for creating high-quality visuals faster and easier. Can't wait to share another update with you soon!

Igor Samokhovets photoIgor Samokhovets

May 27, 2024

Copy link

Lights and Environments

Today's update levels up graphics.

As you may know, in banger.show everything happens in a 3D world. Each object has reflections of an environment, may have shadows or react to lights. This update brings more control over the lights and environments in a scene. Now you can completely change the mood of a scene with just a few clicks.

Added Lights

You can find them on the Objects tab of the editor.

  • Point Light
  • Spot Light
  • Directional Light

Point Light is a light that shines in all directions from a point in space. It is useful for simulating light bulbs and other omnidirectional light sources.

Spot Light is a light that shines from a specific point in a particular direction. It is useful for simulating flashlights, car headlights, and other directed light sources.

Example of Point and Spot Lights. Used to create a spotlight effect from the street light

Directional Light is a light that shines from a specific direction. It is useful for simulating sunlight, moonlight, and other light sources that are very far away.

Directional light with dark color and low intensity
Directional light with green color and medium intensity

Added Environments

Every environment has its own lighting, gamma, and reflections. You can find them on the Environment tab of the editor.

  • Warehouse
  • Apartment
  • City
  • Dawn
  • Forest
  • Lobby
  • Night
  • Sunset
  • Studio
  • Park

How the same scene looks with different environments:

Warehouse. It's used by default in all scenes
Dawn
Apartment

Examples of how more complex scenes can be completely transformed with different environments and lighting:

City
Warehouse
Night
Igor Samokhovets photoIgor Samokhovets

May 20, 2024

Copy link

Basic Shader

The new Basic shader is now available in the editor. You can find it on the Background tab.

This is a simple and versatile shader that can be the basis of your scene. It consists of a background color that can be mixed with an additional color at low frequencies. The intensity is also adjustable.

In addition, you can optionally add stars, which can also be painted in any color and set the intensity.

Basic
Mark Beziaev photoMark Beziaev

May 19, 2024

Copy link

Box Object, Time Display and New Fonts

Time Display is now available in the editor. You can find it on the Objects tab.

Time Display

New fonts

10 new fonts are added to the editor. You can find them while setting up Text or Time Display.

New Fonts

Box Object

You can find it on the Objects tab of the editor.

It's a simple 3D box that lets you create a plane, cube, rectangle or square. Its dimensions, colors and opacity can be customised.

Box
Mark Beziaev photoMark Beziaev

May 16, 2024

Copy link

New Templates, Visualizers and Shader

4 new templates are added to the editor. You can find them on the Templates page.

DJ Spaceship
Breakfast
Night
Studio

Pulsar and Oscilloscope visualizers

2 new visualizers are added to the editor. You can find them in the Objects tab.

Pulsar and Oscilloscope

City Shader

You can find it in the Background tab of the editor.

City
Mark Beziaev photoMark Beziaev

May 13, 2024

Copy link

DJ Spaceship Tutorial

Video guide how to make a music video using a 3D model & effects

Mark Beziaev photoMark Beziaev

May 12, 2024

Copy link

Autofocus Effect

Highlight elements by focusing on them with a camera. I made a short (2 min) video to demonstrate how to use this effect:

Igor Samokhovets photoIgor Samokhovets

May 1, 2024

Copy link

iPhone Player Template

This is no joke. A new template called iPhone Audio Player is now available 😃

It's like a real iPhone audio player from the Files app, but you can customize the background color, rotate it, add effects and more.

It has a nice VHS effect on it but you can make it your own!

Igor Samokhovets photoIgor Samokhovets

April 27, 2024

Copy link

New Shaders

5 new shaders are added to the editor. You can find them in the Background tab.

Kaleidoscope
Eye
Rain
Moon
Flowers
Igor Samokhovets photoIgor Samokhovets

April 23, 2024

Copy link

Start parameters for templates and more

Each template now has a set of start parameters you can customize.

New templates

  • Compact Disc
  • Trip
  • CDJ-4000

Improved video backgrounds

The UI of the video background editor has been improved.

  • Added preview image for the video
  • Added Play video from parameter

Improved performance

A lot of performance issues that were causing the editor re-download all the assets every time you open the project got fixed. By leveraging the browser cache, we've made the editor load much faster and use less network bandwidth.

Igor Samokhovets photoIgor Samokhovets

April 16, 2024

Copy link

Share your projects via link

You can now share your projects via a link. It's a great way to show your work to your friends and followers. To share a project, simply copy the link from your browser's address bar and send it to someone.

Check out this shared video I just made

To edit the project, the person you shared the link with needs to duplicate it first. They can do it by clicking the Duplicate button on the project page.

Auto-save

Previously, the project was saved only when you clicked the Export button. Now, the project is automatically saved every 5 seconds. If you close the tab or browser, your project will be saved and you can continue to work on it later.

Delete Videos

You can now delete your video projects. To delete a project, right-click on a video on the Your Videos page and select Delete.

Igor Samokhovets photoIgor Samokhovets

April 16, 2024

Copy link

Templates

Templates

Banger.show started as a tool where you just fill out the form and get a video. Now we're moving towards a more creative tool where you can add 3D objects, effects and audio-reactive backgrounds.

The Visual Styles button is removed from the editor. Instead, you can now choose a template from the Templates page and start editing from there.

Igor Samokhovets photoIgor Samokhovets

April 15, 2024

Copy link